Wednesday, August 25, 2010

'Karele ki Bhujia' (sliced bitter guard dish)

Karele ki Bhujia or, Karele ki Sabji


It is an all-time favorite dish of North India, in summers. I know I am a bit late in posting this recipe as summers are almost gone but I hope you can still cook and enjoy it in these remaining few days, till 'karela' (bitter guard) and raw mangoes can still be got in the market.


Ingredints:- 
1.  8 to 9 small-medium karele (bitter guard);    2.  4 to 5 medium-sized onions;    3.  2 small-medium raw mangoes;  
4.  2 medium-big green chillies;    5.  A quarter tsp. chillie powder, less than a quarter tsp turmeric powder and salt as per taste;    6.  Oil for deep frying.


Method:-  First of all wash and dry the karelas and chop them into thin slices (2 to 3mm). Sprinkle one heaped tsp. of salt on the sliced karela, mix nicely and keep aside for one hour.


 In the mean- time prepare other ingredients like, remove the skin of mangoes and slice them thinly. You will need to use only one and half sliced mango. Slice the onions and gren chillies also.


After one hour, squeeze-out the water from karela slices by pressing handfuls between palms. Now heat oil for frying in a 'kadahi' or deep frying- pan. When the oil is quite hot, turn the flame to medium and fry karela slices in it. You don't have to fry them brown and crisp. Take them out when they are slightly brown and still soft. The following pictures will make it clear.                


Now you are ready to prepare the bhujia as all your ingredients are ready to be used.


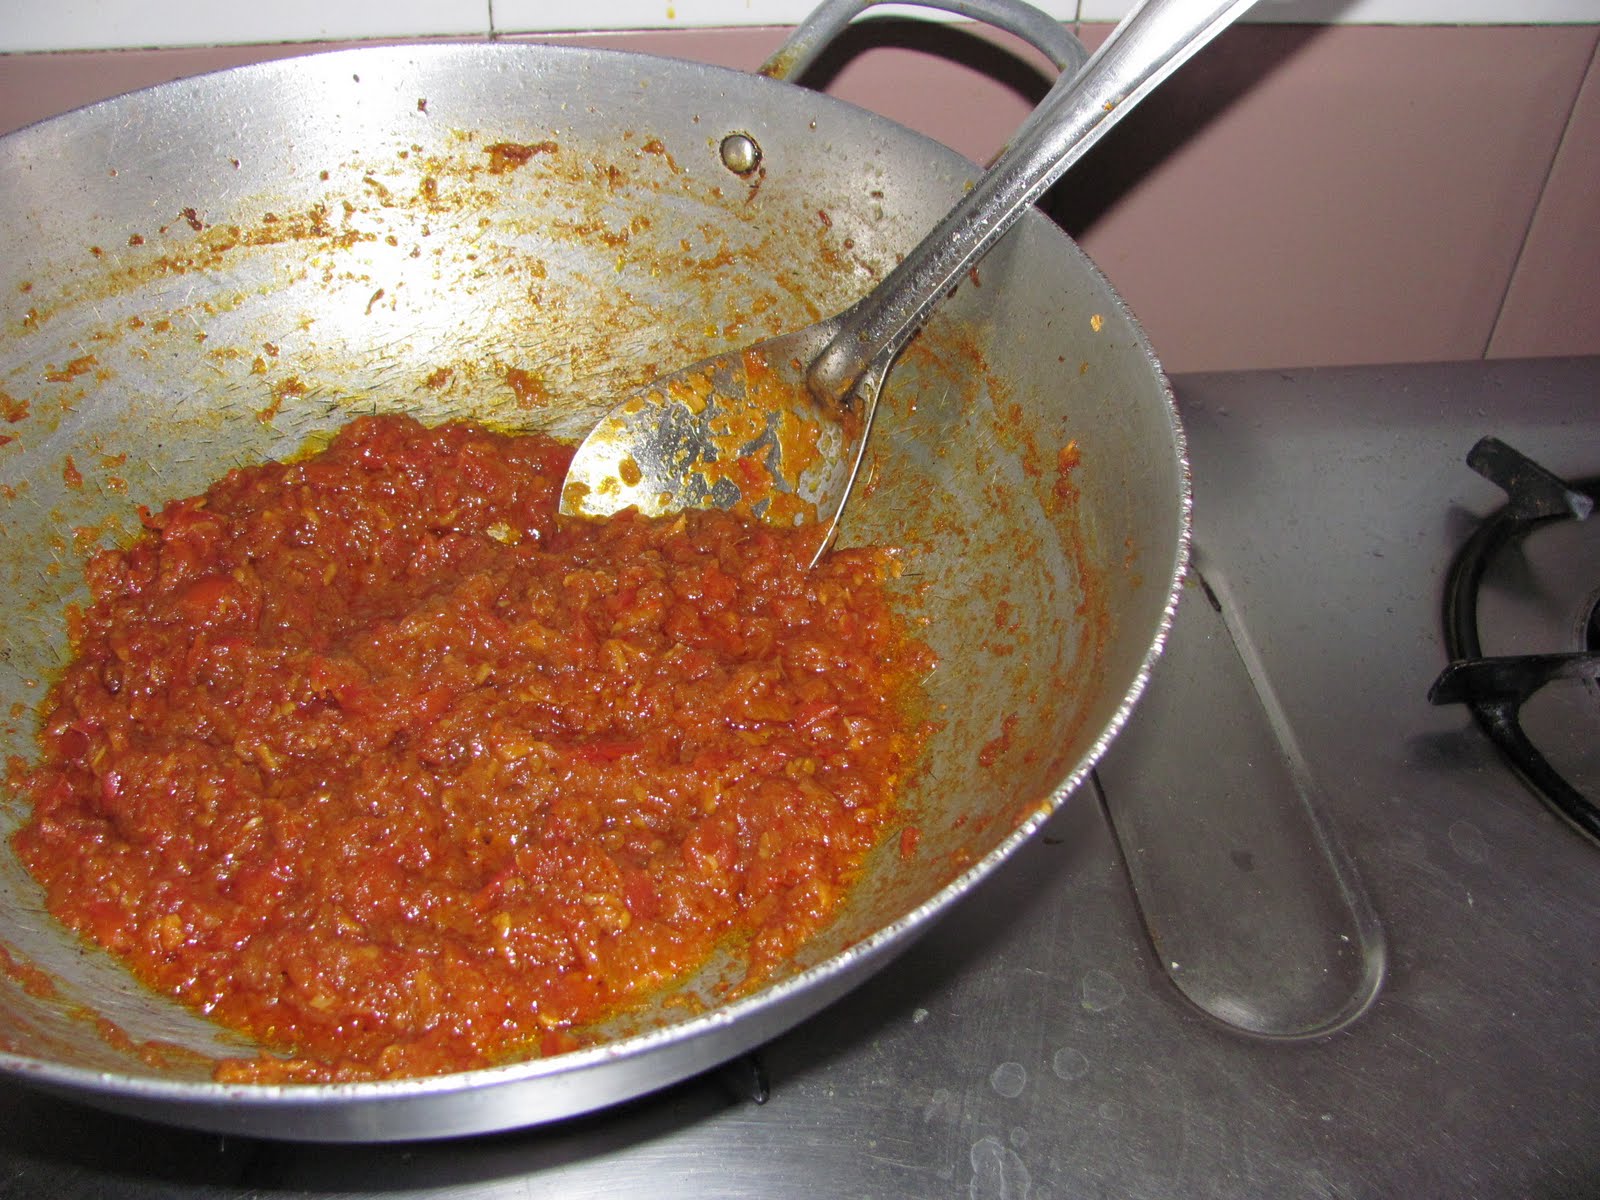
The next thing you do is, take some oil in the kadahi and fry sliced onions in it. The heat should be medium. When the onions are transparent, add green chillies and keep stir- frying. When the chillies are slightly cooked and onions turn pink, add raw mango slices. Fry till onions start turning brown and mango slices become limp. Now you add red chilli, turmeric and salt, mix nicely and stir-fry some more. At this stage, add fried karela slices, mix nicely and let cook for some time, turning frequently but gently, till they are cooked through. Eat a small spoon-full to check the taste. If chilli or salt are less, you can still add them and stir to combine. Your 'Karele ki Bhujia' is ready to be eaten! ( The serial-wise pictures given below will make the whole process very clear).                                                                                                                   


You will enjoy eating this delicacy with 'chapati'  as well as 'puri'.


                                                                      Enjoy!

Tuesday, August 24, 2010

Vnilla-Lemon cake

Vanilla- Lemon Cake


This is a quick and easy' no-fuss' cake, to be enjoyed with tea and, is delicious without any icing!
It does not need any fancy ingredients and does not require elaborate preparations. I think it is a very suitable cake for beginners but busy mothers should also try it and feel the satisfaction of home-baking!
Ingredients-
                  1. Flour-  230 gm.;    2. Baking powder-  2 level tsp.:   3. Powdered sugar-  260 gm.:  4. Vanilla essence-2tsp.:    5. Eggs-4:    6. Curd (or buttermilk)-50gm:    7. finely grated lemon rind- of one medium-sized lemon:    8. lemon juice- of one medium sized lemon:    9. melted 'desi ghee' ( clarified butter) or, refined oil- 150ml.
Method-
1.  Grease and dust the baking pan. A 9x9inch pan is suitable (the pan I used was bigger than required for this cake). and preheat the oven to 180 C. I used both upper and lower coils so the upper crust came out a nice golden-brown.
2.  Sieve together the flour and baking powder 3-4 times so that the baking powder is evenly mixed.
3.  Put everything, except flour and lemon rind, in the bowl and beat at medium speed till everything is nicely combined. Lastly sprinkle lemon rind and flour over the mixture and mix gently with a big spatula taking care that no pockets of dry flour should be left in the mixture.
4.  Pour this batter in the prepared  tin and put in the oven. It should be done in about 40 minutes but you must check with a dry skewer or knitting needle. If it comes out with crumbs attached to it, leave it in the oven for 5 to 10 minutes more and test again. When the cake is done, the skewer should come out clean.
5.  Take the pan out of the oven and put it on a wire rack/stand. Let the cake cool in the pan only.
6.  Stand back and see the speed with which it disappears!


                                                                            Enjoy!         

Sunday, July 4, 2010

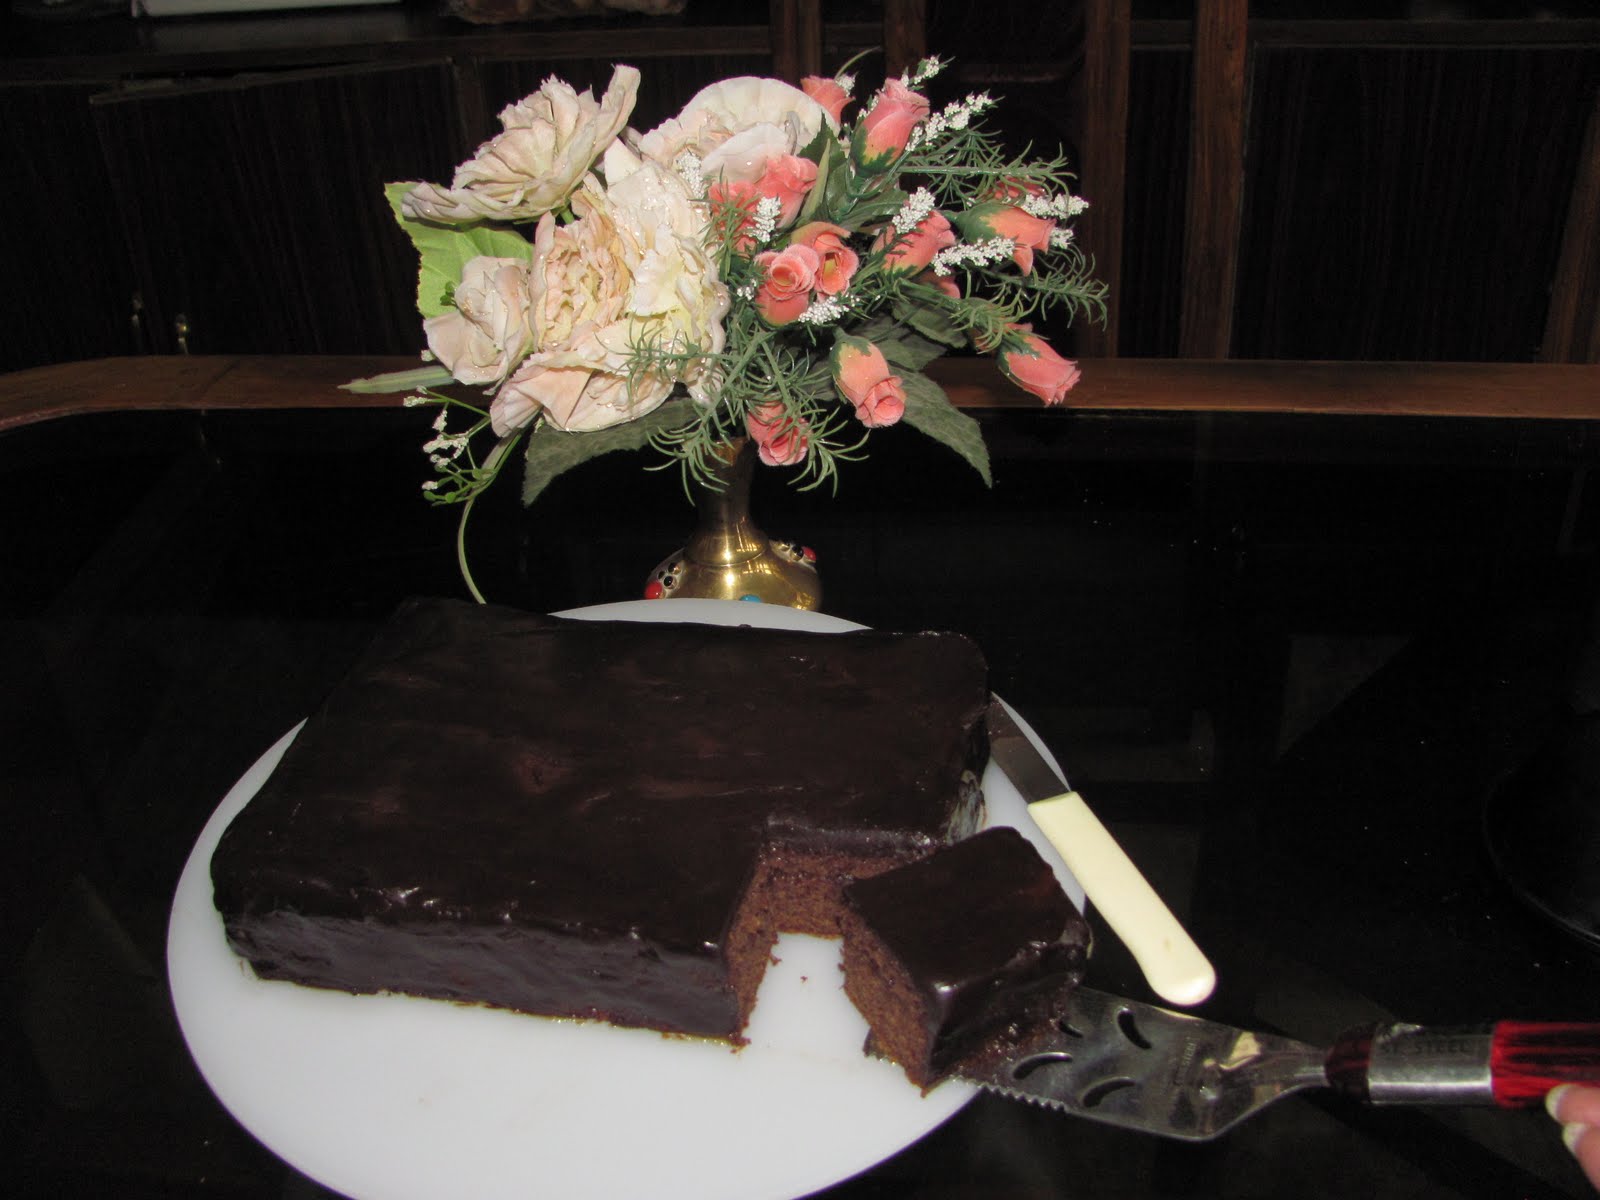
'Sacher Torte'


             The World-famous Viennese Delicacy.


This delightful cake can be described as the all-time favorite of chocolate lovers and, mind you, it's not as difficult to make as you might feel after eating it! Nor is it as time-consuming as some of my earlier gateaux/ desserts have been. If you like baking at home, this is a must for you to try.


Ingredients- 


A-  For Cake:
 (1) 140 gm flour (one standard tea-cup full);    (2) 1 tsp. baking powder;   (3) 110 ml.oil (1/2cup);     (4)  6 eggs, separated;    (5) 130 gm. semisweet chocolate, chopped;   (6) 150 gm. powdered sugar,    (7) 1 tsp. vanilla essence;    (8) 1/5 cup(40 to45 ml) water.
B-  For Glazing and Icing:
  (1) 180 gm. Apricot jam;    (2) 130 gm. semisweet chocolate, chopped;    (3)  100 gm. heavy cream or 'malai';    (4)  30 gm. unsalted butter


Method-    
   1.  Prepare a 9inch x 9inch cake tin. (I made a 7 x 9 inch cake and three small cup cakes), and preheat oven to 160 deg C.
   2.  Melt chopped chocolate with water over gentle heat, in a double boiler. If you don't have a double boiler then the chocolate+ water, in a saucepan, on the mouth of another pan containing lightly simmering water, stirring occasionally till chocolate is melted and you get a smooth mixture. Do not melt the chocolate over high heat as it may seize. Let cool
.3.  Beat egg yolks and 50gm. sugar in a bowl, till pale yellow. Add oil, a little at a time, beating nicely after each addition. Beat continuously till it becomes thick, then add melted chocolate and mix nicely. cover
   and keep aside till you prepare egg whites 


   4.  Beat egg-whites with remaining 100 gm. sugar, on high speed, till stiff. Stop the beater and, with the help of a spatula, gently mix-in the chocolate mixture.Lastly fold-in the flour, with gentle hands, so as not to deflate egg-whites, to get a smooth batter.


   5.  Pour this batter in the prepare pan and bake. It should take 40-45 minutes. Test by inserting a clean skewer in the center of the cake. If it comes out without any crumbs attached, it is done and, if not, keep baking , checking every 6-7 minutes. When done, take out of the oven and keep aside to cool.
   6.  Loosen the cake from the pan with a sharp knife and unmold the cake.Remove the crust, which is very flaky. Wrap it in a plastic wrap and put in the fridge for two hrs. to make slicing it easier. Take out and cut it into two layers.


7. Put the lower layer on a platter and spread apricot jam over it. You will have to warm the jam with a little water to make it smooth and spreadable. Cover with the second layer and then cover the whole cake with a thin layer of apricot jam. Mind you, 'Apricot jam' and 'Only Apricot jam' is acceptable to the admirers of this delicate-tasting specialty! So, if you want to use any other jam, feel free to do so from my side but, don't call it 'Sacher Torte' in front of any baking bigwigs!

                                               
Wrap the whole thing in plastic wrap and refrigerate till next day.
   8.  Next day, take the cake out and prepare 'ganache'. Put chopped chocolate pieces in a bowl.Add butter.
Bring the cream to a boil and pour over the the chocolate pieces, cover and leave for 2 minutes. In 2 minutes the cream would've warmed the chocolate to melting point and the butter would've melted. Stir with a spoon briskly to get a smooth, thick sauce. Let it come down to slightly warm. Pour this sauce on top of the cake, smoothen with a knife and apply on the sides also. Some of it will drip on the platter which you'll have to clean later with the help of a knife and wet kitchen towel. Let this cake sit in the fridge again for 1/2 hr. or so, to let the icing 'set'.


    9.  I covered the cupcakes also with apricot jam and chocolate icing in the same manner.


   10. The only thing remaining now is, to cut the cake and start eating! I must warn you; you can get addicted to this cake! 


                                                                           Enjoy!


Monday, June 28, 2010

Easy 'Mango 'Raita'; anybody can make it!

                   
          A very refreshing, easy-to-make delicacy! 


'Raita' is, almost, 'a must' accompaniment of food in India, specially during summers. This 'Raita' is so easy to make and yet so tasty and refreshing to eat that you would want to make it every day! Mangoes are a-plenty in summers and rest of the ingredients are also easily available in all Indian homes.
Ingredients-  (1) Curds (with a little whey)-1 cup (270gm.),   (2) powdered sugar- 1 heaped tsp.,   (3) salt-to taste,   (4)- 'kala namak' (rock salt)- 1/4 tsp.,   (5) roasted and coarsely powdered jeera (cumin seeds)- 2 generous pinches and one small pinch for garnish, (6) Ripe mangoes-1 big or 1 1/2 small,  (7) Ripe banana-1,   (8) Black pepper powder-a small pinch ( optional).
Method-  1. Take the curd in a bowl and add salt, sugar, roasted jeera powder and pepper (optional). 
2.  Beat nicely with a fork so that you get a smooth, thickish mixture.  Check the taste.   3.  Wash the ripe mango and remove it's skin. Chop the pulp into cubes and add to the curd mixture.Peal the banana, slit lengthwise and chop into small pieces, roughly equal to the size of mango pieces. Add these pieces also to the curd and mix gently as these fruits are very soft. You may ask 'why banana?' It is because banana blends very well, brings a refreshing change in taste and enhances the taste of 'Raita'.  4.  Put it in the fridge to chill slightly.   
Note-  Roasted jeera-powder is not easily available in shops and, if available, lacks the desired aroma. But do not despair, it is very very easy to make at home in a jiffy! Jeera should be dry- roasted (i.e. without oil) on a 'Tava' (griddle), on medium flame, till it browns nicely and leaves a rich aroma. Don't let it get black. Put this roasted jeera on a clean work-surface and grind to a coarse powder with a 'belan' (roller), preferably wooden, while still quite warm. Following pictures will make this process clear.        


5.  Serve your 'Raita' sprinkled with some more jeera powder. This makes a nice accompaniment to 'Rajma' and Rice but can be enjoyed with any type of food or, even on it's own!


Enjoy!

Sunday, June 27, 2010

'Rajma' Punjabi style.

                       
                'Rajma'  yum-yum! ( Indian Kidney-bean curry)


             It is an all-time favorite dish of Punjabis. In fact, it is relished by all Indians. 
Rajma are traditionally eaten with simple boiled rice but, they taste delicious even with 'Paratha', 'Poori', 'Pulao', 'Tandoori roti' or plain every-day 'roti' (chapati). 
Punjabis have a special style of making Rajma. I am going to share with you the way I make them.

Ingredients-        (1)  300gm.'Rajma' (Kidney beans);    (2)  5-6 medium onions;     (3)  8-10 tomatoes;     (4)  1 pod garlic;     (5)  2 inch piece ginger;     (6)  80-100 gm.cooking oil;     (7)  1/3 tsp.turmeric powder;     (8)  1/2 tsp. red chilli powder;     (9)  salt to taste;     (10)  some chopped coriander leaves for garnish.
Method-         1.  Wash rajma 2-3 times and soak overnight (6-8 hrs) in plenty of water. A short-cut method is to soak them in slightly warm water for 3-4 hrs. and, if you do not have time to soak them at all, not to worry, just pressure-cook them for 15-20 minutes longer!
2.  Grate onions after removing their skins and make a paste of ginger and garlic by crushing them together.
3.  Put a 'kadahi' or fry- pan over fire, heat 80 gm. oil and add grated onions.You can add more oil later if
you feel the requirement. Fry onions, stirring contantly so that they do not stick to the bottom. When they become slightly pink in color, add ginger-garlic paste and continue stir-frying till the 'masala' becomes a nice red-brown. Now add turmeric powder, red chilli powder and salt and cook for a few seconds more before adding chopped tomatoes.


Keep frying, stirring constantly, till tomatoes are nicely cooked and become a part of the 'masala' and it starts leaving oil ( you will see tiny bubbles of oil appearing on the fringes). This is the time to add 'rajma'.

4.  Drain the water from the soaked 'rajma' and wash them again in fresh water. Transfer the prepared 'masala' to a pressure cooker, put on the fire, add 'rajma' and stir both the things together for approx. 1 minute. Now add 1 liter water, close the lid and put weight on the pressure-vent when steam appears. You may lower the heat after the first whistle and, cook for 45 minutes after which time, turn the heat off. Let the pressure come down and open the lid to check. 'Rajma' should be very soft and some of them should have started splitting when they are done. The 'masala' should also have turned into a nice, thickish gravy. If the 'rajma' are not nicely cooked, pressure-cook again for 10-15 minutes. You can add more salt or chilli at this stage and, more water also if the curry is thicker than your liking. Boil for a few seconds more after making the additions so that everything is nicely mixed. Sprinkle some chopped coriander leaves and your 'rajma' are ready to eat!
5.  Serve hot 'rajma'  with plain boiled rice/pulao/paratha/poori/tandoori roti or, simple every-day roti (chapati), it is delicious always!

Enjoy!

Thursday, June 17, 2010

'Chhole', the delicious Indian Chickpea curry.


                                                          'Chhole', the way I make them


On popular and express demand of my family and friends, specially my son, who feels that only Bhature makes an incomplete recipe, I am going to share with you how I make this  delciious accompaniment to Bhaturas ( my post of 16 June). 'Chhole' can be eaten with rice, 'paratha', 'naan' or 'Kulche' also but these are considered 'a must'  with bhaturas.


Every family has it's own recipe for making 'chhole' but my family likes them this way-

Ingredients-  (1)200 gm.Kabuli chane (chickpeas),soaked overnight   (2) 3 medium onions, grated,   
(3)1Tbsp.ginger-garlic paste,   (4) 3-4 tomatoes,   (5) 1 small ball tamarind,  
(6) 1/3 tsp. turmeric powder,   (7) 1/2 tsp. chilli powder (you can add more or less),   (8) salt, as per 
your taste,    (9)  25-30gm.Desi ghee (clarified butter) or oil.
For 'Tadka' (garnish)-  1 medium onion cut lengthwise; 1 tomato, chopped; 2-3 green chillies, chopped
1/2 tsp.'garam masala' ( a mixtures of powdered cinnamon, cloves, black cardamoms and coriander seeds),
2 tsp. cumin seeds and, approx. 15 gm desi ghee/oil.

Method-  1.  Heat ghee/oil in the pressure cooker and add grated onions.
2.  Fry onions, stirring constantly, till the color starts changing and then add the ginger-garlic paste. Fry till this 'masala' is nicely browned, stops sticking to the sides of the cooker and, starts leaving oil.
3.  Now add turmeric powder, chilli powder and salt, stir for a few seconds, add tomatoes, and cook some more.
4.  When tomatoes are also nicely cooked, add soaked 'kabuli chana', stir them with the 'masala' for a few seconds and add about 500 ml. water and pressure cook for 30 min. While the chana are cooking, soak
tamarind in hot water, mash it with your fingers after a few minutes, to mix the pulp with water and, strain.
Keep this tamarind water aside for now. 
5.  Open the cooker and check the seasoning. If you find that 'kabuli chana' have not cooked properly
you can pressure-cook them for a further few minutes. They should be nicely cooked and soft. Now add some tamarind water, taste and, see if it is to your satisfaction. The taste of this 'Chhole should be sour but the extent of sourness depends upon your own preference.You can evaporate the excess water at this stage or add some more if you like.
6.  Now you have to prepare the 'tadka'. For this, heat oil in a fry pan, add cumin seeds, fry for 4-5 seconds
and add chopped onion and green chillis. When the onions  start changing color, add tomatoes, cook some more and add 'garam masala'. You don't have to brown the onions and tomatoes here.
Mix this 'Tadka ' into 'chhole' and, bring the whole thing to a boil.
7.  Pour 'Chhole' in a serving bowl, sprinkle chopped coriander and serve with bhaturas.

Enjoy! 


Wednesday, June 16, 2010

Yummy Bhaturas


Bhatura, the delicious Indian fried bread.


Bhaturas are a very popular Indian delicacy and they are eaten, always, with 'chholas'; a special chickpea
curry, made as an accompaniment to bhatura. Though most Indians go to restaurants to eat bhaturas these
days, I like making them at home sometimes as nothing can compare to the home-made version.
Most people think that making bhaturas at home is very difficult but, actually it is not! It's rather easy!
It only needs a bit of time because the dough has to be prepared a few hours in advance as it needs leavening.
But I'm sure, anybody who likes cooking at home will not find it difficult at all. 
I made them yesterday only for dinner and I'm still enjoying it's taste in my mouth!
This is how you can also make it-

Ingredients (for about 18-20 medium-size bhaturas) -                                                                                                                                 
(1).  500gm. all purpose flour (maida);  (2).  150 gm.curds (dahi), you can also use yogurt or thick buttermilk
(3).  1 tsp. baking powder;  (4).  1/2 tsp. baking soda;  (5).  1/2 tsp.salt;  (6).  150-180ml water (the quantity of water can not be exact );    (7)   desi ghee (clarified butter)- 2 Tbsp.;and, (8).  Oil for deep frying.

Method-
1.   First of all sieve together flour, baking powder and baking soda and then sprinkle and mix-in the salt.
Sprinkle 2Tbsp.'desi ghee' (clarified butter) and mix-in with fingertips. You may use oil instead.   


2.   Now add the curd and 150ml. water, mix nicely and knead the dough. Add the rest of the water 1tbsp. at 
  a time, as required. You need a very very soft dough so try to incorporate as much water into it as you can. It will be very sticky initially but as you keep kneading,
  it will turn smooth and stop sticking. It needs to be kneaded for at least 10 minutes, maybe more. When you
  feel that it has become quite smooth and elastic, it is done.


3.   When you are finished kneading, liberally oil a container in which the dough is to be kept for fermenting. Form the dough into a ball, roll it inside the container so that it is covered with oil on all sides, cover with a 
lid and leave it for 3-4 hrs.


4.   In hot weather, the dough is nicely fermented in 3 hrs.so, you can start making bhaturas.Don't keep the dough outside after the necessary time; refrigerate it. Take out and bring to room temperature before making bhaturas. Take one handful
of the dough and form a 'peda' (flat disc). Apply some oil to the 'chakla' (rolling surface) and put the 'peda' on it. As this dough is very soft, it is not easy to roll it so you may have to spread it a little with your fingers, and then roll gently with 'belan' (roller). You will see that when you try spreading it to one side, it tries to shrink back, so you will need to apply some pressure. Do not flip, apply pressure on one side only if you want nice, puffy bhaturas. If you feel the need to apply more oil on the 'chakla', you'll have to do so when the disc has not been spread much as otherwise it may tear. It should be rolled to a thickness of 2mm. Do not worry about making perfect rounds as that is next to impossible!

                                                    
5.   Now you have to fry the bhaturas, and for this you have to heat oil in a 'kadahi' (Indian skillet) to very
 hot, reduce the heat to medium, gently lift the rolled bhatura and slide it into  oil. Cook for about 20 sec.
on one side, press gently to puff it up, it should become golden in color. Now flip and cook for 20-25 sec. on the other side and lo! your bhatura is ready! Now lower the heat, make another 'peda', put the flame on high, roll the 'peda', put the flame on medium again, wait for a few seconds and slide the second bhatura into the oil.  Bhaturas should be served piping hot with hot 'chhole' and onion rings. 
And, in case you want thinner and more fermented bhaturas, let the dough ferment for 9-10 hrs.
You will have to roll this dough really thin and cook in very hot oil for just 5-6 seconds on each side.
They will not puff-up fully. They will be sort of 'blotchy', but some people like them this way. This is how they 
will look-


Enjoy!